Search

Entries by Martie Duncan (339)

Sunday
Jun172012

Simple Summer Drinks for a Crowd: Fresh Fruit Agua Frescas

I was very excited to be asked to participate in this weekend's first ever Freshworks Festival benefiting Jones Valley Urban Farm in Birmingham. Jones Valley is a teaching farm and a garden oasis in the center of downtown Birmingham. Their slogan is "Jones Valley is not just a place where delicious food grows, it is a place where young minds blossom." Their mission is to make the community a healthier place through programs centered around growing fresh fruits and vegetables.

The Freshworks Festival was a day of music, local growers, chef presentations, and food... lots of delicious food, most of it handcrafted from locally produced ingredients. I was honored to be asked to do a presentation for the inagural event and was so pleased to meet so many new friends. One of these new friends is Brittany Russell... Brittany wrote about the day on her blog The Veggie Vore. Read all about Freshworks Festival 2012...

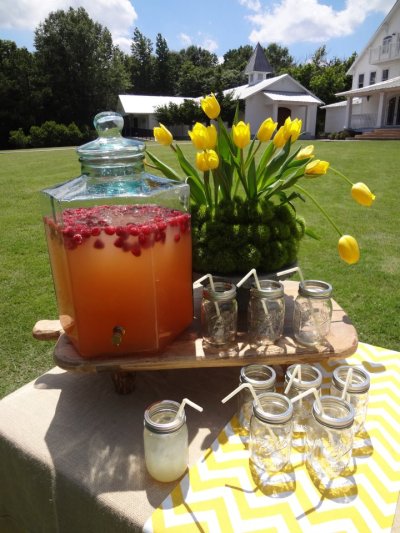
Here's what I made for my presentation... Fresh Fruit Aqua Frescas. Agua Fresca (Spanish translation is fresh water) is fruit infused water. If you have ever been to Mexico, you probably had one. Simply put, it is fruit puree, a bit of sugar and some water. I love them for a party because they are not only delicious, they are simple to make, healthier than soda and sooo refreshing!

You can make almost any type of Aqua Fresca... even sliced cucumber in ice water is so refreshing on a hot day and you really get the flavor of the cucumber. My favorite agua frescas are strawberry, watermelon, and cantaloupe. Other favs are peach, honeydew, blackberry and pineapple.


FRESH WATERMELON AGUA FRESCA

1 small seedless watermelon

1/4 cup sugar (more or less to your taste)

a tiny pinch of kosher salt (omit if you want but it helps bring out the flavor)

Juice of 1/2 lime

4-6 cups water or to taste; this will depend on several factors... how large your melon is, how juicy it is, and how strong you want the resulting drink to be. I like a strong fruit flavor so I use less water, others prefer a hint of juice so use more water.

Cube and seed the watermelon and place in a food processor or blender... or you can use an immersion blender like I do. Add 1 cup of water.

Puree the fruit completely until it is thinned out. Strain the juice with a fine mesh strainer (or you can use cheesecloth) to remove the pulp. Add the sugar and remaining water. Serve over ice with fruit wedges or mint as a garnish.

OPTIONS

Use Infused Simple Syrup

I love to use my favorite infused simply syrups to make agua frescas. I use the mint simple syrup with canteloupe or watermelon. I use basil with strawberry. I use vanilla with pineapple. Get the recipe...

Make it Fizzy

When it is hot outside, a fizzy or sparkling drink just seems to make you cooler... I'm not sure why. I often use club soda instead of tap water for agua frescas... especially if I am going to add alcohol to them.

Add a Kick

If you want to serve Agua Frescas as a cocktail, you can! Reduce the amount of water by half and add Prosecco or Champagne... you will have a Bellini or Mimosa sort of result.

You can also add vodka or tequila to kick these into a true cocktail. Add your alcohol of choice before you add the water. Top with club soda.

FOLLOW ME ON FACEBOOK FOR MORE RECIPES, COCKTAILS, PARTY IDEAS & FUN! 

Saturday
Jun092012

Diablo Chicken Wings

For this episode of Food Network Star, we were to make a favorite dish for a Halloween party. I pitched a number of recipes to Alton Brown that I felt were perfect for a Halloween party: my Roasted Butternut Squash Soup or Caramel Apple Cake among other things... what he decided would be best for the menu was a spicy chicken wing dish that you could make less spicy for the kids by reducing the heat. Here's the recipe:


Diablo Chicken Wings

Ingredients

Marinade

½ cup blood orange juice (ok to substitute regular orange juice)

¼ cup olive oil

2 tablespoons Sirracha           

3 pounds chicken wings, tips removed and drumettes

Glaze

1 large jar apricot preserves
4 tablespoons unsalted butter (½ stick)
½ teaspoon cayenne
¼ teaspoon black pepper
1 tablespoon pumpkin pie spice
½ teaspoon chili powder
1 tablespoon apple cider vinegar
1 teaspoon orange zest
¼ cup lemon juice
1-2 teaspoons Sirracha, optional

Method

Mix the orange juice, olive oil and 2 tablespoons of the Sirracha together in an extra large plastic zip top bag or a large glass bowl. Allow the chicken to marinate as long as possible, overnight is preferable.

Whisk all of the ingredients for the glaze except the butter together in a saucepan. Bring to a boil and cook for 1 minute. Reduce the heat and simmer for 15 minutes. Remove from heat. Add the butter; let sit for 15 minutes to cool and thicken.

Preheat oven to 400 degrees. Prep two large baking sheets with wire racks. Remove the chicken from the marinade and place on the racks. Bake for 45-50 minutes or until chicken is done and the skin is crispy. 

Transfer hot wings from oven to a large heatproof bowl and pour enough sauce into the bowl to coat the wings. Toss to coat well. Transfer wings to a wire rack set over a baking sheet.  Bake 6-7 minutes or until the glaze is caramelized. Brush with a little more sauce if desired. Serve with a dipping sauce like sour cream and chives or scallions.

Yield: 3 dozen wings

Saturday
Jun092012

Martie's Food Network Star Recipe: Tuna Noodle Casserole 2.0

For the record, I am not sure I have ever eaten Tuna Noodle Casserole. My mom was not a big casserole maker so I am pretty sure she never made it. Perhaps I had the boxed kind with the waving potholder once at a friend's house but I'm not even sure about that. My challenge was to make this low-budget wonder into something fashionable.

Not your mother’s tuna casserole or the one from the friendly box, this upgraded recipe calls for decadent tuna belly layered in an ultra rich cream sauce. Layered like lasagna, you can make this in individual ramekins or molds or you can make it in a casserole dish.

Food Network Star: Martie's Tuna Noodle Casserole 2.0 Photo Food NetworkTUNA NOODLE CASSEROLE 2.0

1 box lasagna noodles

1 stick butter, divided

1 large white onion, finely chopped

2 cups milk

3 tablespoons all-purpose flour

1 cup seafood stock

2 tablespoons lemon juice

1 teaspoon fresh thyme, minced

Slight pinch nutmeg

½ teaspoon salt

¼ teaspoon white pepper

6 ounces canned white tuna in spring water, drained

8 ounces canned tuna belly filets in olive oil, drained

2 cups frozen early peas

1 ½ cups Parmesan cheese, grated

2 cups breadcrumbs

1 small bunch fresh parsley stems removed

Preheat oven to 375 degrees. Grease a sheet pan with olive oil. Butter ramekins or casserole dish. Set aside.

For the noodles

Put a pot of salted water on to boil. Drop 6-8 lasagna noodles, taking care not to break them. Cook al dente according to package directions. Do not overcook. Remove the noodles to the greased sheet pan one at a time. The olive oil will keep the noodles from sticking. If you are using ramekins or molds, cut the cooked noodles to a size that will fit with a circle cutter. If you are using a casserole dish, you can cut the noodles to the correct size with a knife or kitchen shears.

For the sauce

Put milk in a saucepan over medium heat and bring just before boiling. Remove from heat. In a large skillet or saucepan, sweat the onions in 3 tablespoons of the butter. Do not allow to brown. Add the flour to form a paste. Cook 3-4 minutes until a pale blonde color. Add the scalded but cooled milk to the roux a little at a time- whisking to keep from clumping. Add one cup of the seafood stock, whisking it in a little at a time. Cook for 15-20 minutes over medium low heat, stirring almost constantly and scraping the bottom to prevent scorching. Reduce heat to low. Add 1 cup grated Parmesan cheese. Add more seafood stock if the sauce is too thick, whisking in a little at a time. Remove from heat. Stir in lemon juice, salt, pepper, nutmeg, thyme, canned white tuna and peas.

For the topping:

Put the breadcrumbs, 4 tablespoons butter, ½ cup Parmesan cheese, parsley, and salt and pepper to taste into the bowl of a food processor and pulse to combine well.

To assemble:

Layer lasagna style, alternating the noodles, sauce, and tuna belly filets, ending with a bit of the sauce on top. Add the topping, making sure to get the topping all the way to the edges of the container.

Place the ramekins or casserole on a baking sheet. Bake for 35 minutes or until golden brown on top.

Friday
Jun082012

Simple Summer Fun: Homemade Vanilla Bean Ice Cream

When I was a kid, my mom would make homemade ice cream every weekend in the summer when we would go to the lake. I'd watch her cook the custard for the ice cream and remember turning the handle to freeze it when I was really young. We'd all take turns cranking for what would seem like hours. Years later, I would help Mom pack the ice and ice cream salt around the container of our electric ice cream maker and even though we didn't have to crank anymore, it still took forever before we'd get that gorgeous, creamy vanilla or fresh peach ice cream.  

Here's the base ice cream recipe my mom used for her homemade ice cream. She always used vanilla extract but I prefer to use the vanilla bean... so much more flavor.

HOMEMADE VANILLA BEAN ICE CREAM

Makes one quart

2 cups heavy cream (you can substitute Half and Half if you want to)

2 cups whole milk

1 cup sugar

1 vanilla bean, split and the seeds scraped

10 egg yolks, beaten

Add the cream, milk, and sugar to a large saucepan. Over medium heat, stir the mixture constantly with a wooden spoon and bring it to 120 degrees. (about 10-12 minutes and the mixture thickens)

Next, temper the egg yolks with the hot mixture. Add the hot mixture to the eggs gradually by whisking 1/2 cup of the cream mixture to the eggs. Repeat two or three more times until you have tempered the yolks. Whisking constantly, add the yolk mixture back into the remaining cream mixture in the pan. If you do this step too quickly, you will cook the eggs with the hot mixture. Add the vanilla beans and the pod. Switch back to a wooden spoon and continue to cook the mixture carefully until it comes to 180 degrees- take care not to allow the mixture come to a boil. Immediately remove from the heat.

Cool completely, stirring frequently. Cover with plastic wrap and put in the refrigerator at least eight hours or overnight. It is even better if you allow the mixture to chill overnight. That way, the flavors have a chance to develop completely before you spin the ice cream. Remove the vanilla bean pod before you freeze the ice cream.

Note: Make sure to chill completely or the ice cream will not freeze. You can chill the mixture down using an ice bath; simply fill a large bowl with ice, water, and salt. Put the pan with the ice cream mixture in it, taking care not to allow water to get in. Stir frequently until the mixture is cold.

Spin the ice cream according to your ice cream maker's instructions. The ice cream never freezes completely so it's best to spoon it into a container and put in the freezer for an hour to harden before serving. If you like a soft-serve consistency, eat it right out of the ice cream maker like I do. 

FOLLOW ME ON FACEBOOK FOR MORE RECIPES, COCKTAILS, PARTY IDEAS & FUN!

Friday
Jun082012

Weekend Cocktail: Raspberry Vanilla Lemonade

I poured a few things together after our photo shoot at the Sonnet House and came  up with this fantastic raspberry vanilla lemonade. You have to try it- it is so delicious and perfect for summer entertaining. I made a hi-test version and one without alcohol for the kids; however when serving both at the same party, make sure you keep them separated or labeled.

First, make up the vanilla bean simple syrup... it keeps in the fridge for a good 3 weeks or so. That way, you have it when you need it. You can do the same thing with mint, thyme. basil, or other herbs.

RASPBERRY VANILLA LEMONADE

Makes about two quarts but it depends on how strong you want the lemonade to be- you can stretch it to a gallon by adding more water. I like it strong because it is always diluted when you add ice. 

INGREDIENTS

2 pints fresh raspberries

2 cups fresh squeezed lemon juice

2 cups sugar

2 cups water

1 vanilla bean

2 quarts cold water*

* add the water to your taste. More if you like it weak, less water if you like it strong. I used about 1 quart water and then added a splash of chilled club soda at serving time to make it a bit fizzy.

OPTIONAL INGREDIENTS

Raspberry vodka

Chambord

Chilled club Soda

Lemon wheels

First, make the simply syrup. Put the sugar and water (equal parts) in a pan and bring to a boil, stirring occasionally. Turn off the heat. Split the vanilla bean down the middle, do not cut it all the way through. Use the tip of your knife to remove the tiny brown seeds inside the vanilla bean. Scrape those into the pan and put the entire pod into the pot and allow to cool completely. I usually put this into a canning jar and store it in the fridge. I leave the vanilla bean in the jar but remove it before using.

For the lemonade: Put one pint of raspberries and the Chambord (if using) into the bottom of the pitcher. Let the berries soak up the Chambord for a while. Use a wooden spoon and mash them to get as much juice as you can out of them. I actually whirred them up with my immersion blender to puree them but you can do it either way. Add the lemon juice and stir together. Add half of the vanilla simple syrup. Stir. Taste. Add the water to your taste. I used about 1 quart cold water and added more of the simple syrup to my taste. But I happen to like it a bit sweet and really strong. Add the remaining raspberries.

If you are adding alcohol, reduce the amount of water to 2 cup. Add 2 cups raspberry vodka. At this point, I sometimes like to put it into the freezer for a few hours and get it slushy. I add one or two bottles of chilled club soda at serving time. If it is a hot day and the temperature requres lots of ice, I always make the lemonade strong without a lot of extra water because as the ice melts, it waters down the lemonade. Just something to think about!

Want to make a lemonade stand? Here's the how-to for more lemonade recipes and the how-to for decorating a lemonade stand.

FOLLOW ME ON FACEBOOK FOR MORE RECIPES, COCKTAILS, PARTY IDEAS & FUN!