Search

Entries in Martie Knows Parties (297)

Saturday
Aug232014

NEWS: NEW WEBSITE HAS LAUNCHED!

Hi Friends...

If you have noticed, I've been very absent from my blog in recent weeks-months as I worked on a new, better website... MartieDuncan.com where you will be able to find party plans, recipes, wedding advice, and tips for bringing your friends and family together for holidays, celebrations, or just a casual weekend get-together.

For now, as I move and add the recipes and content to the new site, I will leave this blog intact but eventually merge them. The new site is much easier to navigate. You can find party ideas for casual get-togethers and holiday celebrations under the celebrations tab. Ane the new site has a place for all of the "how-to" videos I will begin creating soon.

I'm so excited to take Martie Knows Parties on to the next level... Please tell me what you think!

Saturday
May032014

RECIPE: POTATO AND ONION GRATIN; COMFORT FOOD TO FEED A FEW OR A CROWD

I love recipes that can feed a few folks or easily expand to feed an army on the cheap. Well, this is one of those dishes, it is comforting, delicious, so easy to make... best of all, it's so affordable, you can feed a huge crowd for not very much money. Yes, Parmegano-Reggiano is expensive so substitute something else if you must. This is really one of those recipes you will go to time and again. You remember how Bob Tuschman, the head honcho at Food Network said my food was like hot cocoa and warm flannel pajamas? Well, this dish is just that. Get ready to blow the diet; you might eat the whole thing!

POTATO AND ONION GRATIN

Serves 6

Prep: 15

Bake: 1 hour plus 10 minutes

 INGREDIENTS

4 large potatoes, peeled and sliced about 1/4 inch thick

1 small yellow onion, sliced extremely thin

1 tablespoon unsalted butter, at room temperature

1 ½ teaspoons Kosher salt

½ teaspoon white pepper

¼ teaspoon ground black pepper

¼ teaspoon freshly grated nutmeg

3 tablespoons grated Parmigiano-Reggiano cheese plus 2 tablespoons for the top

3 tablespoons grated Gruyere cheese or any other cheese that melts nicely

1 cups heavy cream

½ cup milk (use low fat or whole, it doesn’t matter. I use 2%)

INSTRUCTIONS

Preheat oven to 350° F

Slice the potatoes and rinse. Keep them in water until you assemble the dish. Mix the salt, pepper, and nutmeg together in a small bowl. Set aside.

Liberally grease the bottom of a 10 or 12 inch casserole or gratin dish with the butter.

Drain the potatoes. Blot excess moisture with a paper towel. Arrange a layer of potatoes, overlapping them slightly on the bottom of the dish. Season with half of the salt and pepper mixture. Add a very thin layer of onion, do not overlap. Add half of the cheese. Add another layer of potatoes. Season this layer with the remaining salt mixture. Add the remaining cheese on top. There should be at least three layers, ending with the cheese on top. You may have more, depending on the size of the dish you used.

Carefully pour the heavy cream into the dish, taking care not to pour on the top of the cheese so that it goes down into the bottom of the dish.

Bake for 1 hour or until the potatoes are very soft, the milk is absorbed and the top is golden brown and delicious. It tastes best if allowed to sit for 5-10 minutes before serving.

Monday
Apr212014

RECIPE: CROQUE MONSIEUR FOR TWO OR A CROWD

Have leftover ham after the holiday? Try a deliciously toasty French classic, the Croque Monsieur. Simply said, it is a toasted ham and cheese with Béchamel sauce on the top which is broiled until golden brown. This glamorous sandwich is fantastic party food because you can make a ton of them at one time using a sheet pan or you can slice a loaf lengthwise and make one large sandwich, slicing into wedges to serve. Chez fan-tas-tique!


INGREDIENTS

For 2; simply multiply if you want to make for a crowd

3 tablespoons unsalted butter, room temperature
4 slices bread- if using sandwich bread, cut the crusts off. I like loaf bread sliced 1 1/2” thick
1 tablespoon all-purpose flour
½ cup milk
½ cup grated cheese I like Gruyere and Parmesan but use whatever I have
A pinch nutmeg plus ¼ teaspoon Kosher salt, and a dash white pepper
2 tablespoons Dijon
2-3 slices of leftover ham, sliced medium thickness 

INSTRUCTIONS

Preheat the broiler of your oven or toaster oven with the rack in the center. Line a baking sheet with foil. Sit out the milk before using it so it is not super cold.

Put the butter in a pan over a medium-low heat. Using a pastry brush, brush one side of each slice of bread with a bit of melted butter and put under the broiler until golden brown. Set aside.

Next, over medium-low heat, stir the flour into the remaining butter to make a paste. Cook and stir for one minute, then gradually whisk in the milk, a little at a time, until smooth. Simmer, stirring frequently with a wooden spoon, until the mixture thickens and coats the back of the spoon. You know it is ready when you can draw a line down the back of the spoon with your finger and it stays separated. Remove from the heat. Add nutmeg, salt and pepper; check seasoning.

Spread the untoasted sides of the bread with Dijon, then put the ham on top, followed by the half the cheese. Broil for 3-4 minutes until the cheese is bubbly and melted.

Top with the other slice of bread. Press down; I use a large spatula for this. Put the sandwiches on to the baking sheet you prepared and top with Béchamel sauce, allowing some to drip over the sides of the bread. Top each with the remaining cheese. Broil for about 5 minutes or until golden and bubbling, and serve immediately.

Sunday
Apr202014

RECIPE: LEMON RICOTTA POUND CAKE

Living out in the sticks or always being on the road in someone else's kitchen, you would think I'd make sure I had everything I needed BEFORE I started cooking. I'm not sure how many times I need to learn that lesson... BUT if you watched me on Food Network Star, you know I am usually able to come up with something pretty good, even if I originally started out with plans to make a completely different dish. That's what happened yesterday. I planned to make my Mom's pound cake for Easter but as I was already in the middle of creaming the butter, I discovered the cream cheese was waaay past the expiration date. I did however, have some perfectly good ricotta cheese in the fridge so I ended up with a Lemon Ricotta Pound Cake. It was so light, so moist yet a bit fluffy and very good. It was so good, I've already gotten a request for the recipe so I thought I'd share it with all of you, too. This will never replace my Mom's pound cake but I gotta tell you, it is the perfect shower, party or afternoon tea cake. Put it on your list to try!

My Lemon Ricotta Pound Cake is a fluffy, light variation on my Mom's original pound cake recipe. An accident turned delicious!

LEMON RICOTTA POUND CAKE

Cook Time: 1 hour 20 minutes or until a wooden skewer comes out clean

INGREDIENTS

3 sticks butter, room temperature

1 1/2 cups whole milk ricotta cheese, room temperature

3 cups granulated sugar

2 teaspoons lemon zest

juice of one lemon (about 1/4 cup)

4 whole eggs, room temperature

2 egg whites, room temperature

3 cups all-purpose flour

1/2 tsp pure vanilla extract

1 1/2 tsp lemon extract

1/8 tsp salt

LEMON GLAZE

Juice of 1 lemon

1 1/2 cups Confectioners' sugar (plus more if desired)

INSTRUCTIONS

Preheat oven to 300. Prep two 9 x 5 loaf pans. Grease and flour or spray all sides with Baker's Joy.

In the bowl of your mixer, beat the butter at medium speed until creamy. Add the ricotta and beat until combined. Then add the sugar, a little at a time. Cream the butter and sugar until light and fluffy. Next, add the lemon zest and the eggs, one at a time, beating until they are combined. Add the egg whites and beat until they are just incorporated. Turn the speed on the mixer down. Add the lemon juice. Combine the salt and the flour; adding a little at a time to the mixer until it is blended. Add the vanilla and lemon extracts.

Pour into the prepared pans. Place on a baking sheet and place on center rack of your oven. Bake for 1 hour 20 to 1 hour 30 minutes or until a toothpick inserted into the center comes out clean. Cool for 10 minutes in the pan and then turn out onto a wire cooling rack to allow it to cool until just slightly warm before icing.

For the glaze, combine the lemon juice and Confectioners' sugar and whisk; the glaze should be thick and creamy and not too stiff. You should be able to pour it. Add more lemon juice or sugar as necessary to achieve the pourable consistency.

Using a toothpick, poke a few holes into the top of the cake. Pour onto the top of the cake and spread. Allow to cool. Add a second layer if you want a thick glaze.

Serve with berries, whipped cream or any of your favorites.

WANT THE ORIGINAL RECIPE FOR MY MOM'S POUND CAKE? HERE YOU GO....

Wednesday
Apr022014

GIRLS NIGHT IN: HOST A DIY CENTERPIECE PARTY!

The nice folks at Seagram's Escapes asked me for some Spring party ideas... here's one I think you'll love!

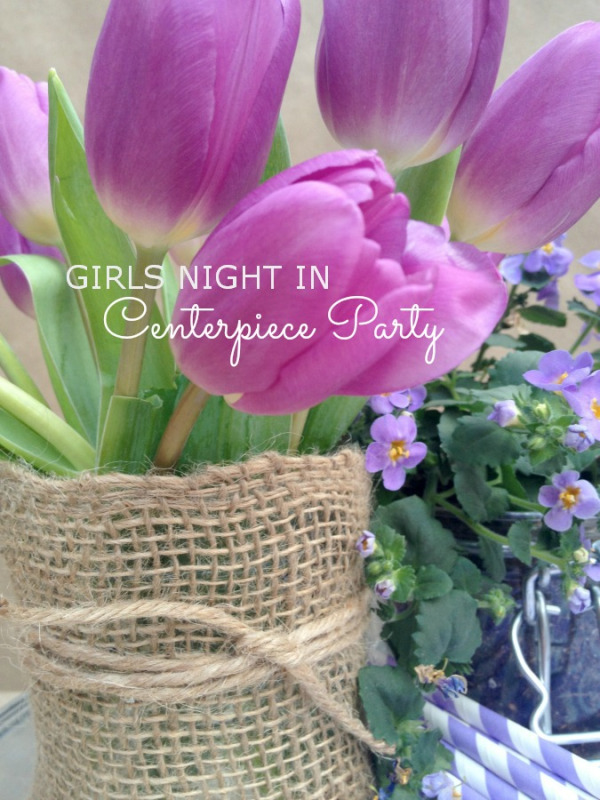
With Easter just weeks away, I've got a fun (and productive) party idea for your next Girls Night In get-together. Why not host a DIY centerpiece party? Each year, a few weeks before Easter, I get lots of emails and questions about Easter decorations and tablesettings. Here's a party theme that will not only allow you to spend time with your friends, you can go home with a beautiful centerpiece... just in time for your Easter Sunday celebration. It's also a great party plan for that DIY bride or class reunion, too!


THE SET UP

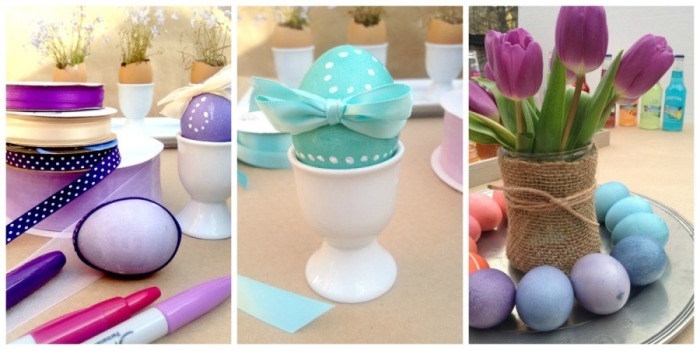
This is a very simple party to host. You provides the drinks, the food, and a large workspace with plenty of room. Guests will bring what they need for her own centerpiece plus tools like floral wire, floral sheers, ribbon, etc. You can all share supplies. Ask guests to email a list of what they are bringing- you may need to make a trip to Michael's, Hobby Lobby or a local floral supply store to pick up the basics if you don't have them. If you are planning this party for the week of Easter, you might also set up a station to dye Easter eggs. That way, you can have eggs already dyed for the kids to decorate.

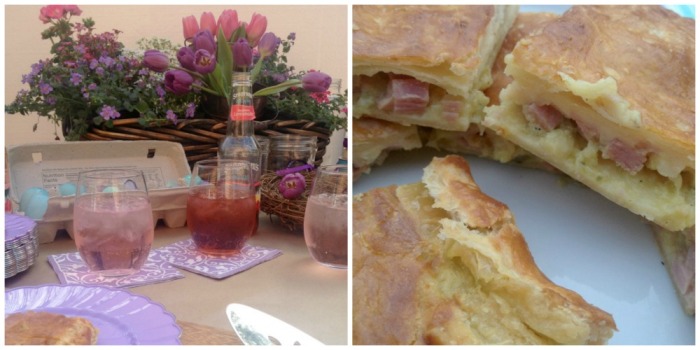
I've been so in love with the purple hues of Spring... inspired by Radiant Orchid, the Pantone color of the year. I used that as the foundation for my color scheme with pretty plates, napkins, straws and flowers in those purple tones to anchor the look. I added a special dessert cocktail in the same color palette to make it really special!

Get annuals or herbs from the garden center in addition to cut flowers. Later you can plant them in the yard and enjoy them all summer long.

In the Spring, I always like to use herbs or flowers from the garden center for my centerpieces... that way, after the party is over, I can plant them in the yard and enjoy them all summer long. I picked up a few bunches of tulips at the store, too. I got a twig wreath and some bird nests at the craft store and found floral foam, wire and twine there also. If you want a rustic look, use Mason jars in several sizes. If you are using metal containers, they tend to leak. To avoid this, fit a small jar or plastic container into the bottom and fill that with water. 

Cover your work space with a plastic backed drop cloth from the home improvement store or use brown craft paper... I used did both to make clean up easy. It is important to use layers of newspaper if you will be dying eggs; they make a mess and the stain is virtually impossible to remove.

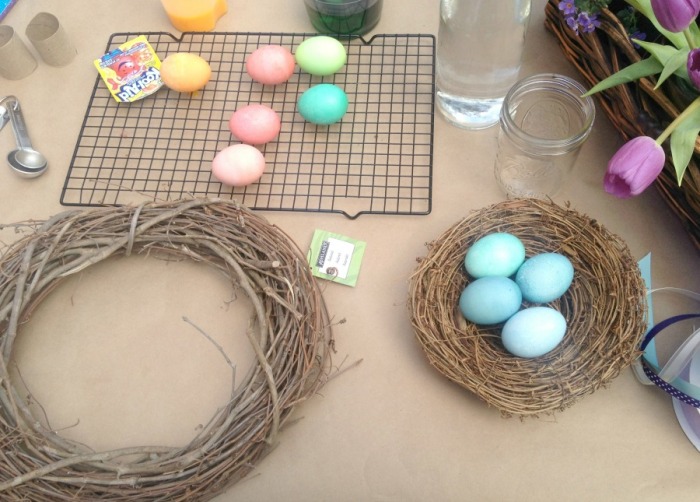
Cover your work station with brown craft paper. Twig wreaths, bird nests, and floral supplies can be found craft stores like Michael's and Hobby Lobby.

FOOD & DRINKS

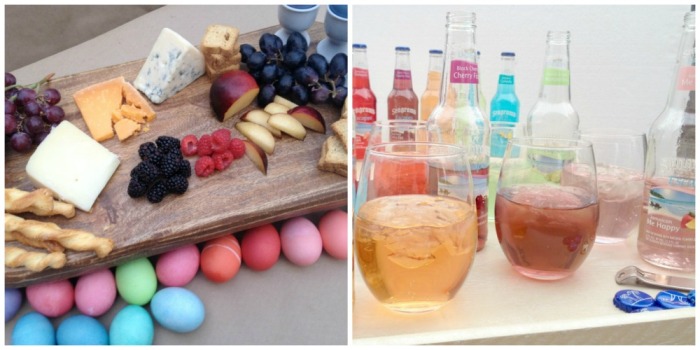
Girls Night is soooo about the cocktails and quality time catching up with friends but since this party is centered around an activity, I wanted to keep the menu very simple and did not want to have to fuss with the bar. Seagram's Escapes were not only the perfect colors for the party, the wide variety of flavors insured there would be something for everyone. Put them on ice and offer some fruit mix-ins; they come in 4-packs or you can find them at Sam's and the big stores in multi-flavor cases; perfect for a party.

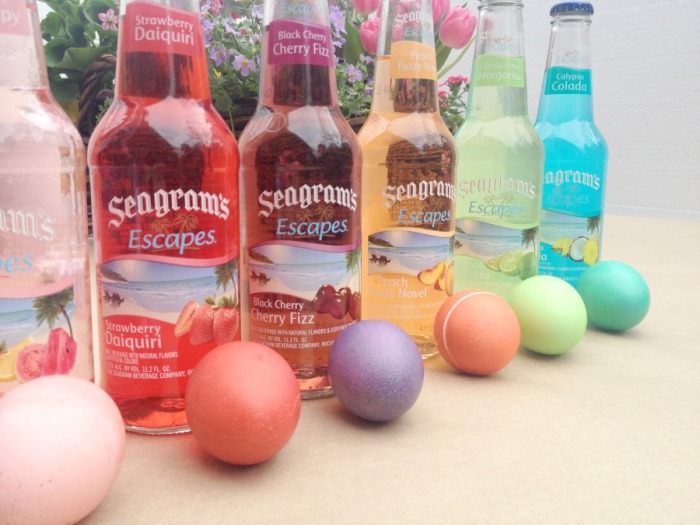
Seagram's Escapes are light, fruity fun and the perfect colors for the party theme.

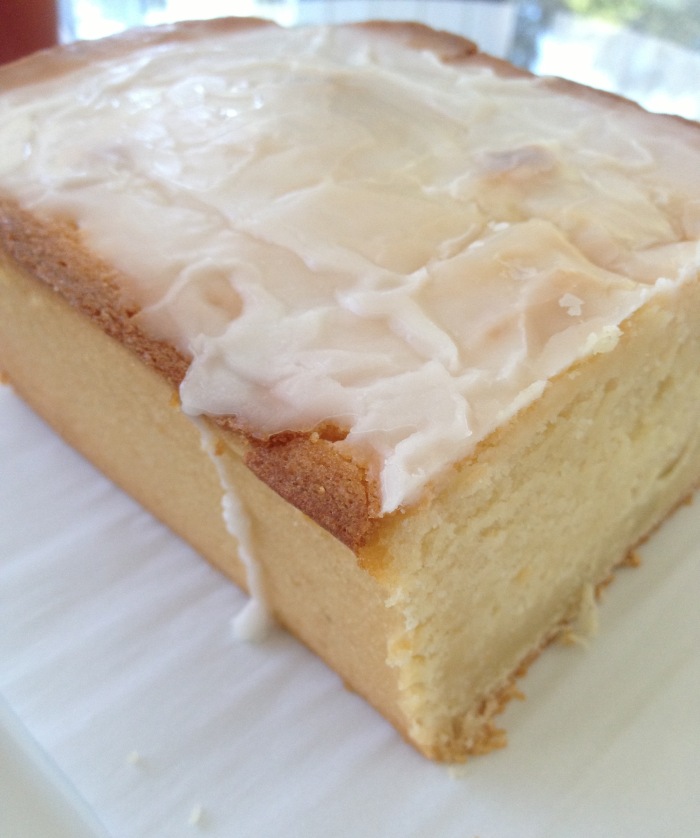
Keep the food simple as well. A cheese board with 3-4 cheeses plus crackers, fruit, honey, jam and other pairings is the perfect way to start the party. It is easy to assemble and there's no cooking required. Make one of your party favorites that is easy to eat standing up or while working. I made Puffy Party Squares because they are easy, fast and inexpensive but also because everyone loves them. Get the recipe... 

And because there has to be something sweet on the menu, I came up with these incredible Very Berry Ice Cream Floats for dessert... again, very simple, no cooking required and completely addictive.

Very Berry Grown Up Ice Cream Floats

Here's the how to:

VERY BERRY ICE CREAM FLOATS

1 small container fresh blackberries or raspberries

1 half gallon container vanilla ice cream

Chambord Liqueur

4 Seagram's Escapes, Black Cherry Fizz flavor, chilled

Chill the glasses in the freezer so they are cold.

Put 3 blackberries or raspberries in the bottom of a glass. Muddle slightly with a wooden spoon to break up the fruit. Add 2-3 scoops of vanilla ice cream. Pour over 1 tablespoon of Chambord liqueur. Fill each glass with the Seagram's Escapes... add a straw and enjoy!

THE ACTIVITY

Making centerpieces and decorating eggs can be as easy or as complex as your time and patience allow. If you look at Pinterest, you can see a million different ideas for every taste and every budget. I'm a big fan of cheap that looks expensive so that's what I was aiming for with my flower arrangement. I also like the idea of repurposing the flowers in the garden or container after the party is over.

My own style is very relaxed and easy so my centerpieces tend to be rustic and take about 6 minutes to create. When making a centerpiece for a dinner table, I want it to be low so guests can see each other across the table. Here's what I came up with using annuals and one bunch of tulips. After Easter is over, I'll plant the annuals in containers to brighten up my deck this summer. 

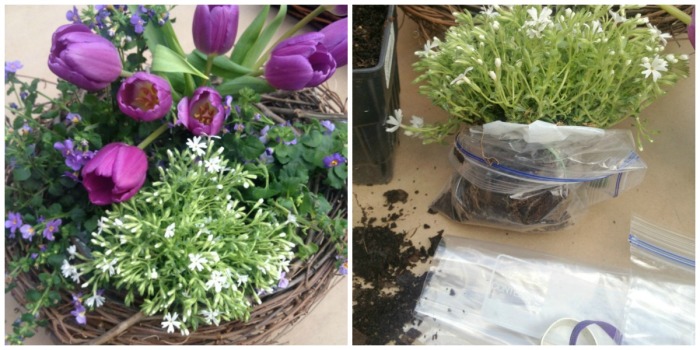
Use garden center annuals to create a lasting flower arrangement. Carefully remove the annuals from their plastic container, keeping the root ball intact. Put it into a plastic bag and secure with a rubber band. Use one plastic sandwich bag for each plant. Make sure the soil is damp- but not too wet. Arrange the flowers in a platter, basket, wreath or other short container. Add some fresh cut flowers also for a little height. Done!

This could even be a wonderful family get-together with the cousins or a fun annual neighborhood party. The adults can make flower arrangements and the kids can decorate eggs at a craft station set up with stickers, glitter, glue and other supplies.


REMEMBER TO ALWAYS DRINK RESPONSIBLY AND TO NEVER DRINK AND DRIVE. 

Visit SEAGRAMSESCAPES.COM to find drink recipes, store locations and more.