Search

Entries in centerpiece ideas (20)

Friday
Oct312008

Last Minute Halloween Decorating

It seems to me as if we've been celebrating Halloween for quite a while now since we've been talking about it for so long. Well, the big day is finally here and we're getting everything ready to greet the kids stopping by my fabulous friend and photographer Arden's house.

We've pulled together a quickie Halloween party table complete with easy decorations, creeeeepy chocolate gummy worm cupcakes, eyeball punch, and lots of treats for the kiddies. If you still have to decorate for tonight--- here's the easiest solution for a centerpiece or front porch decoration. It's a plastic version of our Pumpkin People that so many of you commented on but there's no carving and no mess. Simply take three of the plastic Halloween pumpkins you buy for trick or treating. They have them everywhere. I got these at Walgreen's for only 29 cents each! Before you stack them, pop in a flameless votive, mini flashlight, or a tiny round LED like I used. They will light up the centerpiece from inside. The pumpkins have a rim on the bottom so they stack easily, but I secured them with a little double stick tape. Now simply dress or accesorize your people with a hat, scarf of spider webs, or anything else you might have around. This centerpiece cost less than $4 and all of the kids love it! I took all of these pictures with my iPhone as we went along so we could rush them to the blog in time for you to have them today for your party tonight! Happy Halloween!
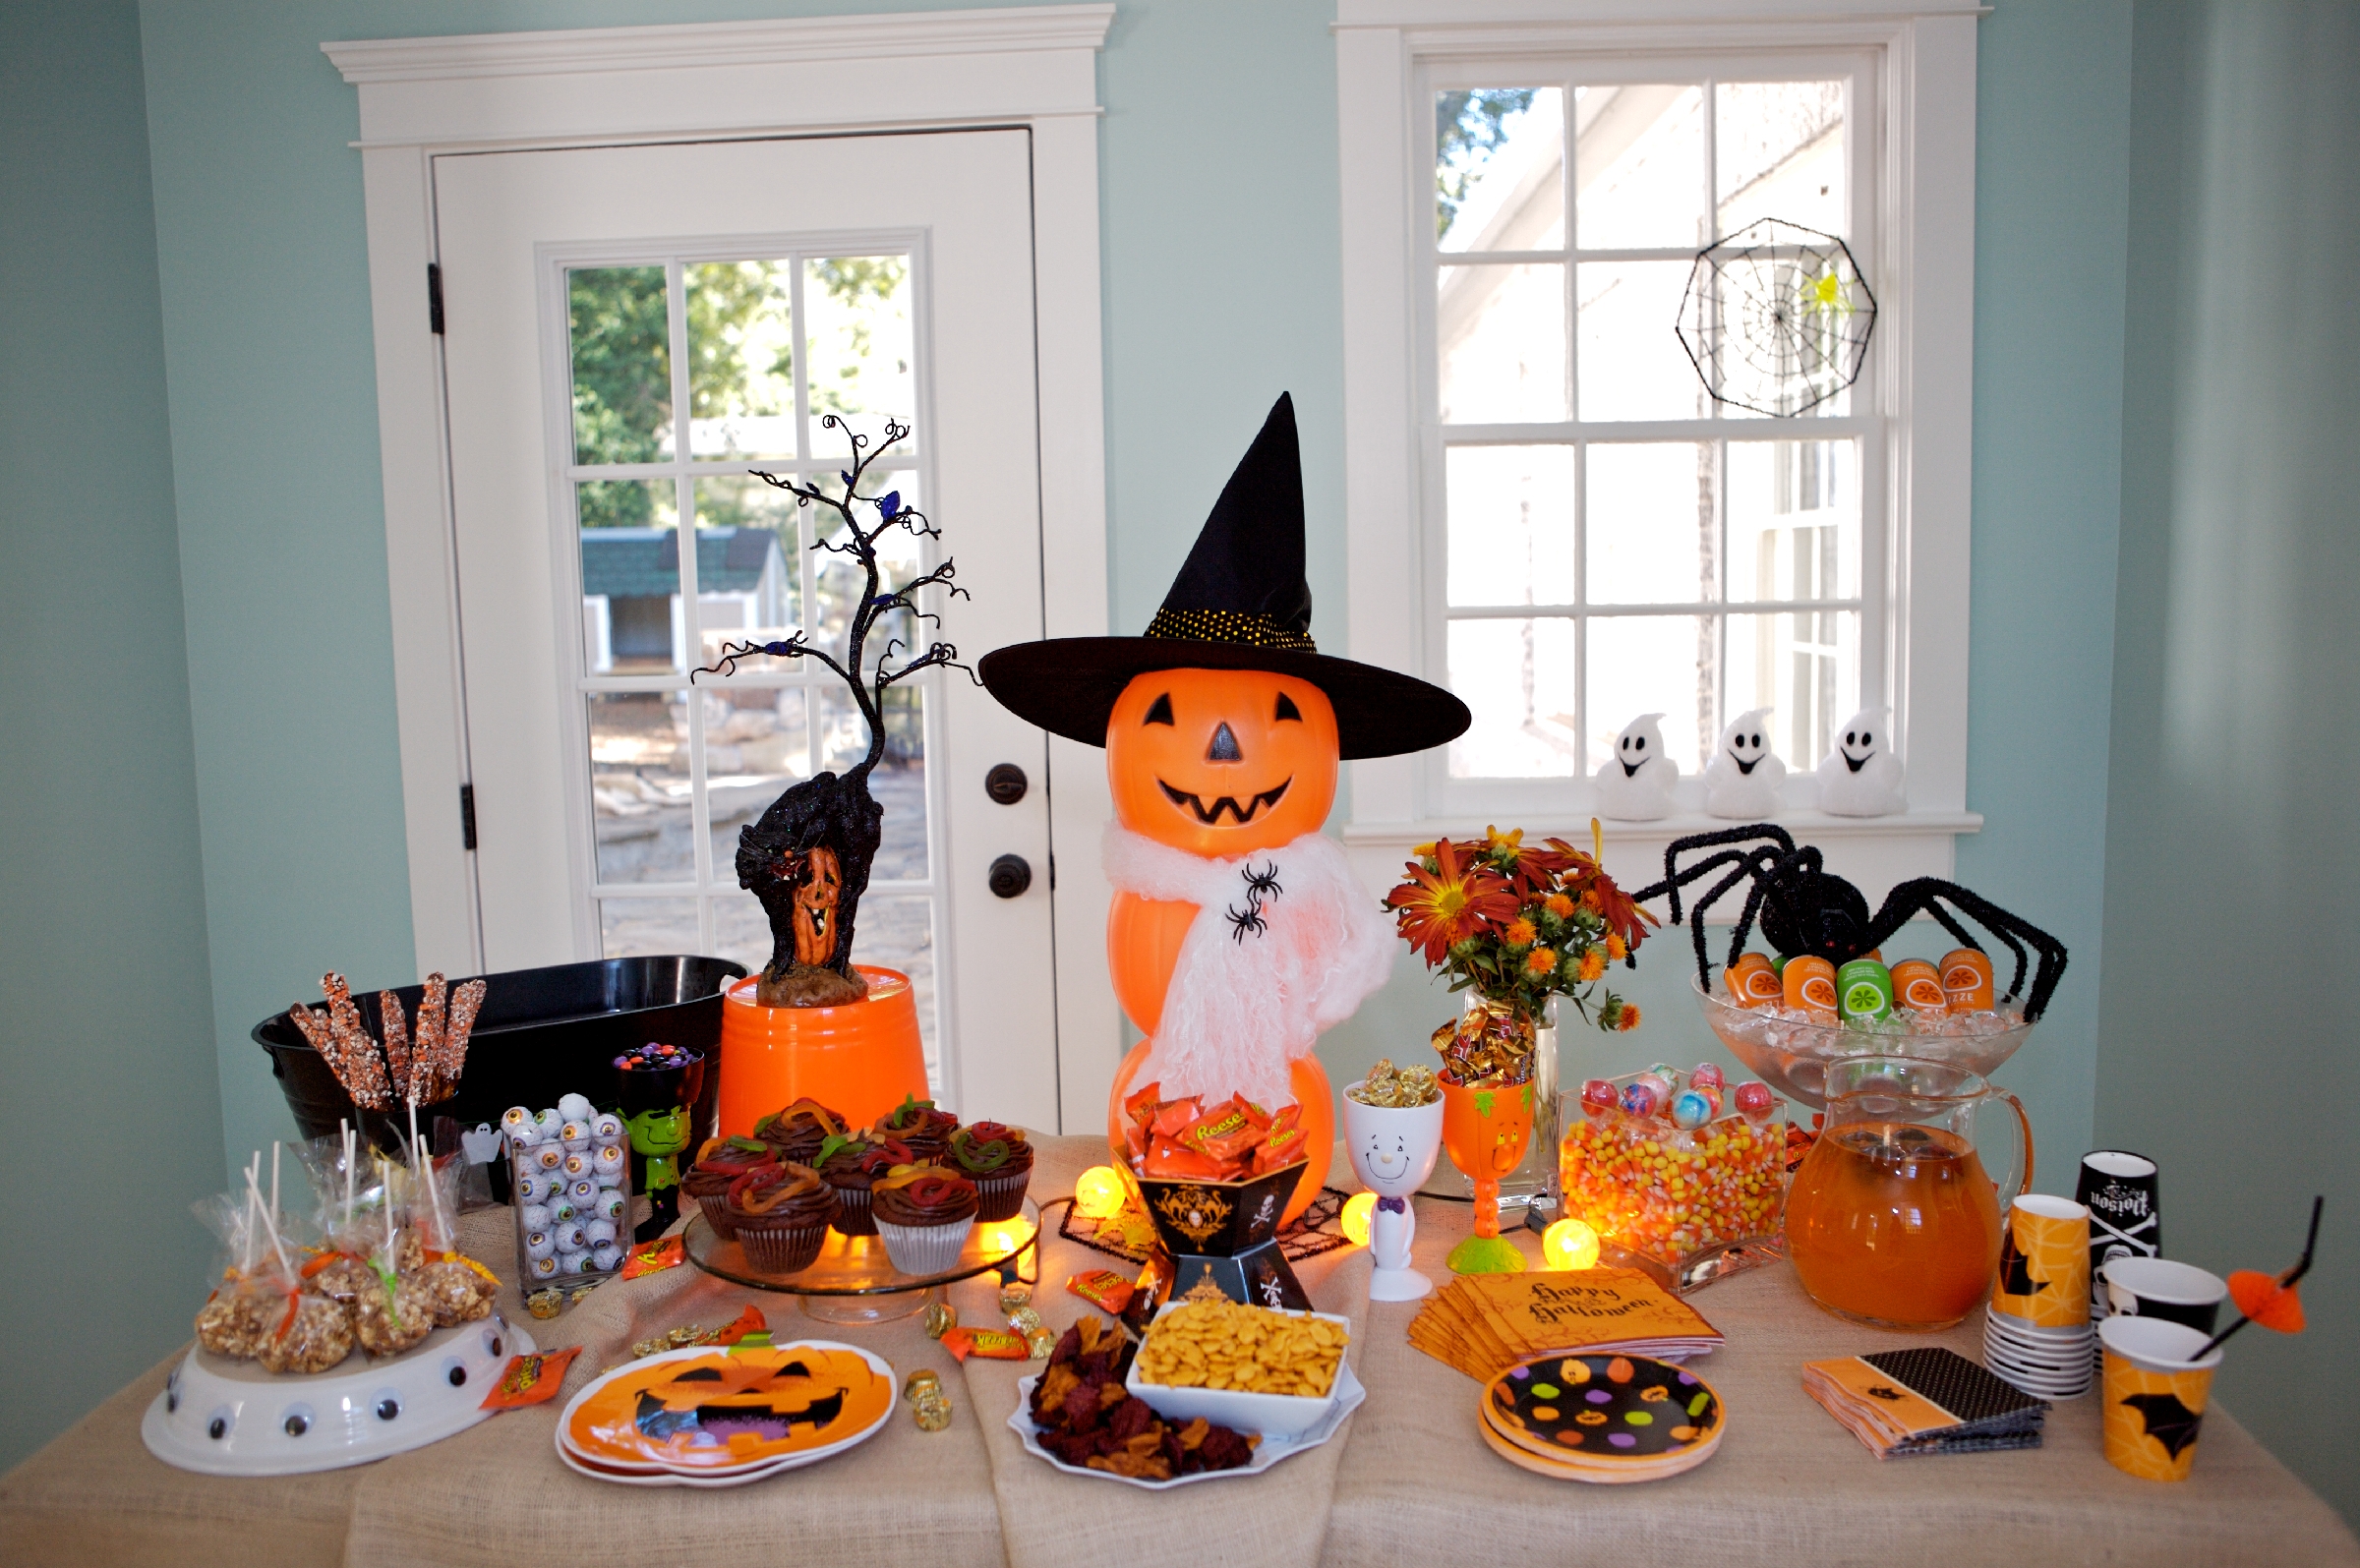
 

Monday
Oct062008

Gourd Flower Vases

G Gourd vases for Fall decorating are so pretty and so super easy! When I say easy, you know I mean it because I don't like complicated projects.

Here's all you have to do:

Cut the gourd at the top to create the neck of the vase. Use your knife to cut an X deep into the flesh of the gourd.

Then use a large spoon to scoop out the inside of the gourd. Make sure to get it as clean as you can but don't pierce the skin or your vase will leak. It might leak anyway so be sure to place it on a dish just in case.

The alternative is to put a zip top bag into the gourd once you have hollowed it, making sure to fold 2" of the bag over the top. Secure with a rubber band. Fill the bag with water. Arrange your flowers. Pust the bag and the rubber band up so it is hidden beneath the flowers.

Once you have the gourd completely hollowed out, add water and flowers of your choice. I used goldenrod from the yard and then added thistle, mums and roses. It only took about 20 minutes and the result? You tell me what you think. My friends loved it.

Party on, ya'll.

Wednesday
Oct012008

The Great Pumpkin, Gourds and Fall Party Decorations

Fall decorating supplies are very expensive these days so I decided to see if I could make my own decorations and keep the price low, low, low. I went to the farmer's market and found everything I needed for fall party decorations. I hope I can use these through Thanksgiving. Pumpkins and gourds of all shapes, sizes and colors were everywhere--- it's the season. The colors were so vibrant--- yellows, oranges, rich reds, dark copper and brown. And they were cheap, too. We brought home our haul and started hollowing out gourds to use for party decorations. The large gourds are perfect for vases and the small gourds are ideal containers for votives and tea lights.

To make the candle holder: Use a paring knife to cut the top off of the gourd then scoop out the inside. You can put the tea light into the bottom of the gourd, which accomplishes two things. It keeps the wind from blowing out the flame and it results in a softer glow. You can also fit the tea light into the top of the gourd. Use a toothpick to keep the candle from falling in like I did in the picture below.


For our flower arrangements, I was lucky enough to find a farmer selling bittersweet. I love bittersweet-- these yellow and orange berrylike branches. They are perfect for centerpieces and look great in the yard as an accent to mums and other fall flowers. The mums were so vibrant and full-- we loaded up the car with them. Here's a sneak peak at some of the goodies we picked up.

And this was all very affordable, too! I looked at pumpkins at the grocery and even at  the "big box" store and I paid less at the farmer's market for all of these gourds and 3 big pumpkins  than I would for one large pumpkin at the other places. I was even able to pick up a few large yellow mums , too. I spent less than $40 for all of it.  You can find decorative pumpkins and gourds almost anywhere  and at every price. I made these for less than $1 each and it was a fun project, too. Just make sure to give the kids a spoon to hollow out the gourds. The Band-Aid around my right thumb is proof that you need to leave the knife work to the skilled adults.

Party on, ya'll.  

Friday
Jul182008

Easy Centerpiece Idea

uploaded-file-53605Want an easy idea for a centerpiece for your next party? Check out this fish bowl idea. It's an easy and fun addition to your table. It was inexpensive but added a lot of impact and a little whimsy. I put the vase on a candle holder with a wide base and used mounting tape to secure it.   

Fish $5 each (Pier 1)

Round Vase: $6 (Wal-Mart)

Sea Glass $6 (Target)

Check out the rest of the images from this Mexican Riviera beach themed party on MSN


Photo credit: Arden Photography

Thursday
Jul172008

Another Vote for Best Summer Drink: The Double Bubble

The Double Bubble! All you need is sparkling Italian soda  and Prosecco. You can find the Prosecco at any wine store and the sparkling soda at Target, Whole Foods, or World Market. I love the Target brand---and it is only $2.50 a bottle. It comes in several different flavors but I used the blood orange for this recipe.  DIY Garden Party

The Double Bubble

3 ounces sparkling Italian soda

1-2 ounces Prosecco

This refreshing cocktail is my spin on the traditional Mimosa but you serve it on the rocks. All you have to do is pour the sparkling Italian soda over ice and float the Prosecco on top. Delish!                                          

Photo credit Arden Photography

Page 1 ... 1 2 3 4